Make Exposure Compensation Your Next Best Friend!
Have you ever shot a photo that was almost perfect except that it was a bit too dark (underexposed) or a bit too light (overexposed)? What did you do?
As amazing as today’s cameras are, they are still at the mercy of their internal light meter, and sometimes they need a little adjustment to get the perfect exposure. That’s where exposure compensation comes in, and after today’s tutorial, I think it will quickly become your next best friend.
Like in cooking where an extra splash of garlic or salt does the trick, using exposure compensation will allow you to retake the photograph with different exposure settings to either darken or brighten the image to your “taste.”
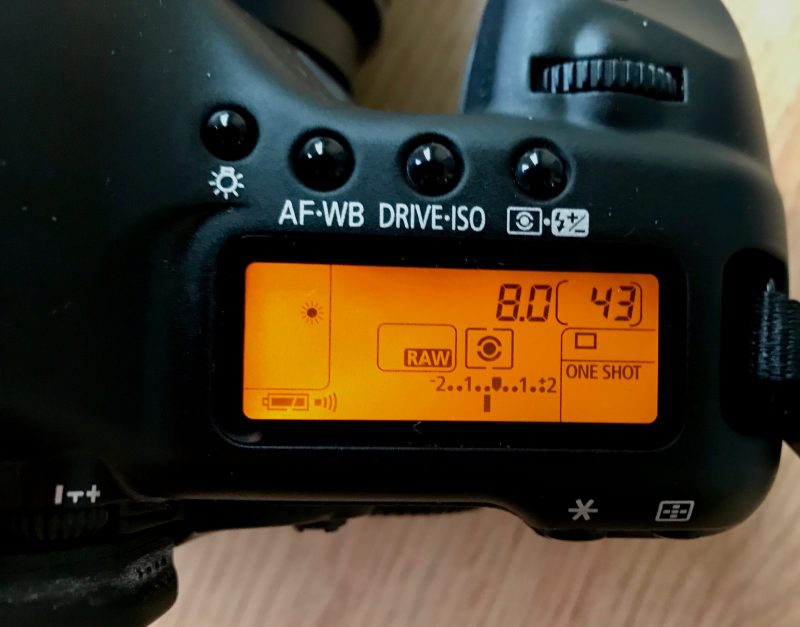
To get started, you first have to select one of these shooting modes: <P>, <AV>, or <TV>. Check your camera for a symbol that looks like a +/- inside a box. If you can’t find it, refer to your camera manual and search for exposure compensation. Some models display exposure compensation as a linear graph like this: -2..-1..0..+1..+2. This graph shows up in your viewfinder as you look through the camera and on the top display window, as shown in the photograph above.
The zero in the middle represents what the camera thinks is the correct exposure. You can adjust the exposure to meet your needs by adjusting the dial two stops darker (-2) to two stops brighter (+2), typically in 1/3-stop increments.
To change your camera’s exposure settings, simply move the indicator (by turning a dial) in either direction, depending on whether your goal is to darken (-) the image or brighten (+) it. The further you move the indicator away from the center 0 point, the more significant the exposure change will be.
Once you’ve adjusted the exposure compensation, you’ll need to take another photo for the new setting to take effect. Just like with adjusting white balance, the compensation change does not affect images you have previously taken – only the new ones you’re about to take.
I use exposure compensation mainly when I am shooting in AV mode or Aperture Priority mode. I set the f/stop based on what depth of field I want, the camera sets the shutter speed, and I take a photograph. If it looks either too dark or too light, then I quickly adjust the dial on my camera to set my exposure compensation. I then refocus on the subject and retake the image to ensure that my adjustments were correct.
Like any new skill, you will need to practice using the exposure compensation option. The more you play with the power of exposure compensation, the more intuitive the process will become. Before you know it, you’ll be able to guess the settings that best suit your taste and lighting situations.
Remember, anytime you can get the photograph right “in the camera,” you should spend the time doing so. It will free up so much time in post-production because then you will only be making minor adjustments to your files, and the integrity of the file will not be in question – hence a better quality image.
I hope you enjoyed this post. What other photography topics, camera settings or post-production techniques would you like to know more about? Please put them in the comments section and I will address them in future articles.
Happy Shooting!